Implementing Ad TXT on your WordPress site doesn’t have to be daunting. From my experience at Novatixel, adding Ad TXT is a crucial step in enhancing your site’s advertising effectiveness and ensuring clarity with ad networks. I’ve guided numerous clients through this process, and it’s simpler than many realise.Here’s a glimpse of the straightforward steps you’ll follow:
- access your website’s root directory
- Create or update the Ad TXT file
- Ensure all entries are accurate and compliant
- Upload the file to your server
By taking these steps, you’ll not only optimize your ad revenue but also build trust with your audience and advertisers alike.
Table of Contents
- Understanding Ad TXT and its Importance for Your WordPress Site
- The Simple Process to Create Your Ad TXT File Effortlessly
- How to Add Ad TXT to WordPress: A Step-by-Step Guide
- Best Practices for Managing and Updating your Ad TXT on WordPress
- Common Mistakes to Avoid When Adding Ad TXT to Your Site
- Q&A
- In Conclusion

Understanding Ad TXT and Its Importance for Your WordPress Site
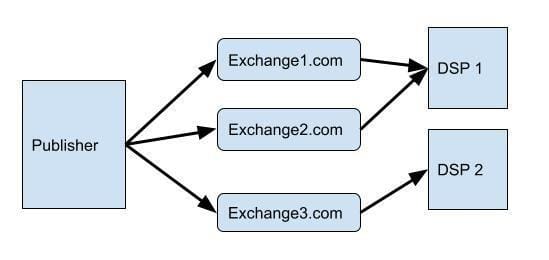
Ad TXT is a simple yet powerful initiative that I’ve found indispensable for enhancing the credibility of my WordPress sites. Essentially, it’s a plain text file that publishers host on their servers, listing authorized digital sellers of their ad inventory. This transparency not only builds trust with advertisers but also ensures that only verified partners can sell your ad space, significantly reducing the risk of unauthorized and fraudulent activities.
Implementing Ad TXT has transformed the way I approach programmatic advertising on my websites. By clearly delineating which ad networks are approved to operate on my site, it streamlines the ad buying process and minimizes discrepancies.This clarity leads to more efficient ad placements and better alignment with quality advertisers, ultimately fostering a healthier advertising ecosystem.
One of the key benefits I’ve noticed since adopting Ad TXT is the positive impact on my site’s revenue. With increased transparency,advertisers are more willing to invest in ad placements,knowing that their ads are reaching legitimate and trusted platforms. Additionally, by preventing unauthorized sales, I ensure that my ad space is utilized optimally, maximizing potential earnings without compromising on quality.
Setting up Ad TXT on a WordPress site is straightforward and can be seamlessly integrated with existing workflows. Here are some steps I typically follow:
- Create an ad.txt file listing your authorized sellers.
- Upload the file to the root directory of your WordPress installation.
- Verify the implementation using tools provided by ad platforms.
By taking these steps, you not only safeguard your ad revenue but also contribute to a more transparent and trustworthy online advertising environment.

The Simple Process to Create Your Ad TXT File Effortlessly
Creating an Ad TXT file doesn’t have to be daunting. From my experience,the key is breaking down the process into manageable steps. First, you’ll need to gather all authorized sellers for your domain, which ensures that your advertising inventory is protected and transparent.
Once you’ve identified the authorized sellers, the next step is to format them correctly in the Ad TXT file. I recommend using a simple text editor like Notepad or a code editor such as VS Code for this task. Here’s a brief overview of how to structure your file:
- Begin with the “v=” tag to specify the Ad TXT version.
- Add each authorized seller on a new line using the “
domain.com, DIRECT, f08c47fec0942fa0” format. - Ensure there are no extra spaces or special characters to prevent errors.
After formatting, it’s time to upload the Ad TXT file to your website’s root directory. I usually use an FTP client or the file manager in my hosting control panel for this step. To verify that everything is set up correctly, simply navigate to yourdomain.com/ads.txt in your browser. It should display the contents of your Ad TXT file without any issues. Maintaining and updating this file regularly is crucial to keep your advertising partnerships secure and up-to-date.

How to Add Ad TXT to WordPress: A Step-by-Step Guide
Managing your site’s advertising effectively starts with implementing an ads.txt file. This simple text file helps prevent unauthorized inventory sales by listing approved digital sellers, enhancing your site’s credibility with advertisers and platforms. I’ve found that maintaining a correct ads.txt not only safeguards your revenue streams but also streamlines your ad operations.
First, you’ll need to create the ads.txt file. Open a plain text editor and add the necessary authorized seller entries,which typically include:
- Domain of the advertising system (e.g., google.com)
- Your unique Publisher ID
- The Relationship Type (e.g., DIRECT or RESELLER)
- Certification Authority ID (optional)
Ensuring each line follows the correct format is crucial for the file to function properly.
Next, you’ll need to upload the ads.txt file to your WordPress site’s root directory. There are multiple ways to do this:
- Using FTP: Connect to your server via FTP client and place the ads.txt file in the root folder.
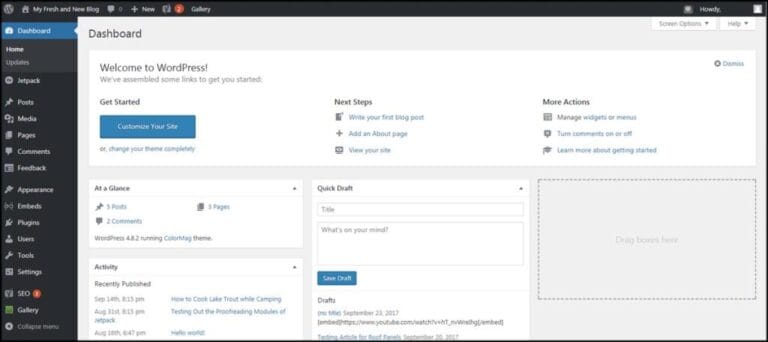
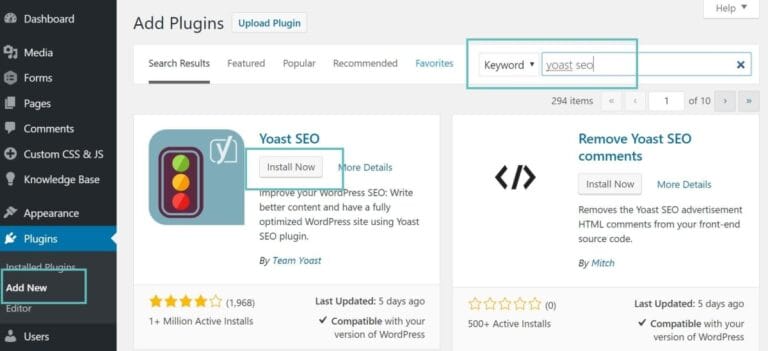
- Through WordPress Plugins: Utilize plugins like “Ads.txt Manager” to add and manage your ads.txt directly from the dashboard.
- File Manager in Hosting Control Panel: Use your hosting provider’s file manager to upload the file.
Personally, I prefer using a plugin for its simplicity and ease of updates.
it’s essential to verify and maintain your ads.txt file. After uploading, navigate to yourdomain.com/ads.txt to ensure it’s accessible. Regularly review and update the file whenever you add or remove advertising partners to keep it current. This proactive approach helps maintain trust with your advertisers and prevents potential revenue loss due to unauthorized sales.

best Practices for Managing and Updating Your Ad TXT on WordPress
Maintaining an accurate Ads.txt file is crucial for protecting your site’s advertising ecosystem. I make it a priority to regularly review the entries to ensure that only authorized partners can sell my ad inventory. This proactive approach helps prevent unauthorized resellers from misrepresenting my site’s inventory, safeguarding both my revenue and reputation.
To streamline the management process, I rely on reliable WordPress plugins.These tools simplify updates and reduce the risk of manual errors. Here are a few I recommend:
- Ads.txt Manager: Offers an intuitive interface for editing your Ads.txt file directly from the wordpress dashboard.
- WP Ads control: Provides extensive control over your advertising settings, including Ads.txt integration.
- Ads Integration Plugin: Facilitates seamless integration of Ads.txt with additional ad management features.
Ensuring the correct syntax and placement of your Ads.txt file is essential for it to function properly. Here’s a simple structure I follow:
| Field | Description |
|---|---|
| Domain | The advertising system’s domain that is authorized to sell your inventory. |
| Publisher ID | Your unique identifier with the advertising system. |
| Relationship | Defines the type of relationship (e.g., DIRECT or RESELLER). |
Security is another critical aspect I focus on when managing Ads.txt. Implementing measures such as regular backups and restricting file access ensures that unauthorized changes are prevented. Additionally, I monitor file integrity using security plugins to detect and respond to any suspicious modifications promptly. By adhering to these best practices, I maintain a secure and effective Ads.txt setup that supports my site’s advertising goals.

Common mistakes to avoid When adding Ad TXT to Your Site
One of the most frequent errors I encounter is placing the ads.txt file in the wrong directory. It’s crucial to ensure that the file is located in your site’s root directory, such as https://yoursite.com/ads.txt. If it’s nested within a subfolder, search engines and ad platforms won’t be able to locate it, rendering the file ineffective.
Another common mistake involves syntax errors within the ads.txt file. Even a minor typo can disrupt the entire setup. I always double-check entries for accuracy, ensuring that each line follows the correct format: domain, publisher ID, relationship, and certification authority ID. Using a text editor with syntax highlighting can definitely help spot these errors quickly.
Regular maintenance is essential, yet many site owners overlook this. Failing to update the ads.txt file when adding or removing authorized sellers can lead to unauthorized sales and potential revenue loss. I recommend scheduling periodic reviews of your ads.txt to keep it current and secure.
access permissions also play a critical role. if your ads.txt file isn’t publicly accessible, it defeats its purpose. I use the following checklist to ensure proper accessibility:
- Public Access: Verify that the file can be accessed without any authentication.
- Correct Permissions: Set appropriate file permissions, typically
644, to allow reading by web crawlers. - No Redirects: ensure there are no redirects that might prevent direct access to the ads.txt file.
| Common Mistake | Solution |
|---|---|
| Incorrect file placement | Place ads.txt in the root directory |
| Syntax errors | Use a text editor with syntax highlighting and follow the correct format |
| Outdated entries | Regularly update the ads.txt file to reflect current authorized sellers |
| Access restrictions | Ensure ads.txt is publicly accessible with correct permissions |
Q&A
What is Ad TXT and why is it notable for my WordPress site?
Ad TXT is a simple text file that websites use to declare authorized digital sellers. Implementing Ad TXT on your WordPress site helps prevent unauthorized ad inventory sales, ensuring that your ads are served by legitimate sources. From my experience, this adds a layer of trust and can improve your site’s ad revenue by attracting reputable advertisers.
How do I generate an Ad TXT file for my website?
Generating an Ad TXT file involves listing all authorized ad networks and sellers for your site. I typically start by gathering the Ad TXT facts from each ad partner I work with. Using a text editor, I compile their entries into a single file named “ads.txt” and ensure it adheres to the correct syntax. This file will later be uploaded to the root directory of your WordPress site.
What are the steps to add ad TXT to WordPress?
Adding Ad TXT to wordpress is straightforward. First, create your ads.txt file with the necessary entries. Next,access your WordPress dashboard and navigate to the File Manager via your hosting provider or use an FTP client. Upload the ads.txt file to the root directory of your website.verify the upload by visiting yourdomain.com/ads.txt to ensure it’s publicly accessible.
Can I add Ad TXT manually in WordPress without a plugin?
Yes, you can add Ad TXT manually without relying on a plugin. By accessing your site’s root directory through an FTP client or your hosting provider’s file manager, you can upload the ads.txt file directly. This method is efficient and reduces the need for additional plugins,which can definitely help maintain your site’s performance.
How does adding Ad TXT improve my site’s ad performance?
Implementing Ad TXT enhances your site’s ad performance by ensuring that only authorized sellers can monetize your ad inventory. This reduces the risk of fraudulent activities and increases advertiser confidence. Personally, I’ve noticed that sites with a properly configured ads.txt file tend to attract higher-quality ads,leading to better revenue outcomes.
In Conclusion
Adding an Ad TXT file to your WordPress site is a straightforward process that can significantly enhance your ad monetization strategy. I’ve found that implementing these easy steps not only safeguards your ad revenue but also ensures a smoother experience for your audience. If you follow the guidelines outlined above, you’ll be well on your way to optimizing your website’s advertising potential. Should you have any questions or need further assistance, feel free to reach out. I’m here to help you make the most of your online business.


